2D Splatter Effects in Unity Using the Stencil Buffer
December 07, 2015
While reading Zack Bell’s excellent game development blog I was intrigued by the splatter effects used in his game called INK or in other games like Super Meet Boy. As an experiment I decided to try to find an easy way to pull off something similar in Unity. Based on some previous reading I’ve done regarding the stencil buffer, using it along with some custom shaders seemed like the simplest approach.
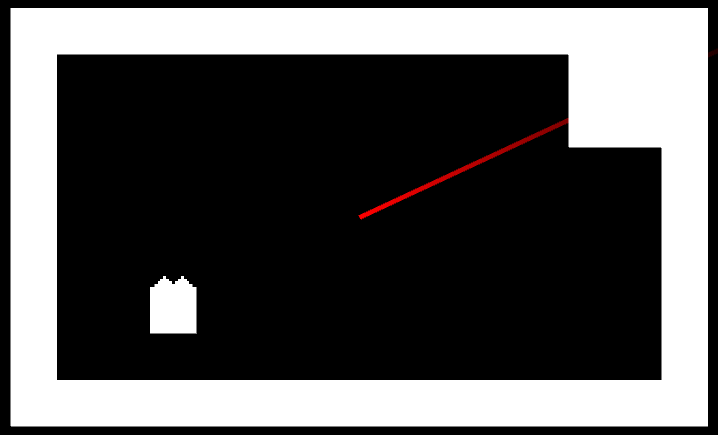
This is the kind of effect that’s possible using only the stencil buffer and a few sprites.
The stencil buffer is a pixel mask that can be used in shaders to save or discard pixels. It is simply a buffer where an integer is stored for each pixel. In your shader to can change the stencil buffer value, or optionally draw based on the stencil value. For more information on the stencil shader and various stencil operations, check out the Unity documentation. This post will be about achieving a specific effect using the stencil buffer, not a run-down of everything it has to offer.
Our shaders will be slight modifications on Unity’s standard sprite shader to add the stencil operations. Luckily you can download all of the built-in shaders here so we don’t have to write everything from scratch. These will be used as a base for these tutorials, so the rendering will be very close to standard Unity sprites.
Start by creating two new shaders in your project called Surface and Splatter. For the Surface shader, we want to add a Stencil block that sets the buffer value to 5 for any drawn surface pixel. Below is the Stencil block that we will be adding to the shader in its Pass block. The full shaders will be added further below. We also added an _AlphaCutoff property, which allows the splatter to draw properly on non-rectangular sprites like spikes.
Stencil
{
  Ref 5
  Comp Always
  Pass Replace
}
For the Splatter shader, we only want to draw splatter sprite pixels where the stencil buffer has been set to 5. This ensures that splatter is only drawn on surface pixels.
Stencil
{
  Ref 5
  Comp Equal
}
The full Surface.shader:
Shader "Splatter/Surface"
{
	Properties
	{
		[PerRendererData] _MainTex ("Sprite Texture", 2D) = "white" {}
		_Color ("Tint", Color) = (1,1,1,1)
		[MaterialToggle] PixelSnap ("Pixel snap", Float) = 0
		_AlphaCutoff("Alpha Cutoff", Range(0.01, 1.0)) = 0.01
	}

	SubShader
	{
		Tags
		{
			"Queue"="Transparent"
			"IgnoreProjector"="True"
			"RenderType"="Transparent"
			"PreviewType"="Plane"
			"CanUseSpriteAtlas"="True"
		}

		Cull Off
		Lighting Off
		ZWrite Off
		Blend One OneMinusSrcAlpha

		Pass
		{
			Stencil
			{
				Ref 5
				Comp Always
				Pass Replace
			}

		CGPROGRAM
			#pragma vertex vert
			#pragma fragment frag
			#pragma multi_compile _ PIXELSNAP_ON
			#include "UnityCG.cginc"

			struct appdata_t
			{
				float4 vertex   : POSITION;
				float4 color    : COLOR;
				float2 texcoord : TEXCOORD0;
			};

			struct v2f
			{
				float4 vertex   : SV_POSITION;
				fixed4 color    : COLOR;
				half2 texcoord  : TEXCOORD0;
			};

			fixed4 _Color;
			fixed _AlphaCutoff;

			v2f vert(appdata_t IN)
			{
				v2f OUT;
				OUT.vertex = mul(UNITY_MATRIX_MVP, IN.vertex);
				OUT.texcoord = IN.texcoord;
				OUT.color = IN.color * _Color;
				#ifdef PIXELSNAP_ON
				OUT.vertex = UnityPixelSnap (OUT.vertex);
				#endif

				return OUT;
			}

			sampler2D _MainTex;
			sampler2D _AlphaTex;
			float _AlphaSplitEnabled;

			fixed4 SampleSpriteTexture (float2 uv)
			{
				fixed4 color = tex2D (_MainTex, uv);
				if (_AlphaSplitEnabled)
					color.a = tex2D (_AlphaTex, uv).r;

				return color;
			}

			fixed4 frag(v2f IN) : SV_Target
			{
				fixed4 c = SampleSpriteTexture (IN.texcoord) * IN.color;
				c.rgb *= c.a;

        // Discard pixels below cutoff so that stencil is only updated for visible pixels.
				clip(c.a - _AlphaCutoff);

				return c;
			}
		ENDCG
		}
	}
}
The full Splatter.shader:
Shader "Splatter/Splatter"
{
	Properties
	{
		[PerRendererData] _MainTex ("Sprite Texture", 2D) = "white" {}
		_Color ("Tint", Color) = (1,1,1,1)
		[MaterialToggle] PixelSnap ("Pixel snap", Float) = 0
	}

	SubShader
	{
		Tags
		{
			"Queue"="Transparent"
			"IgnoreProjector"="True"
			"RenderType"="Transparent"
			"PreviewType"="Plane"
			"CanUseSpriteAtlas"="True"
		}

		Cull Off
		Lighting Off
		ZWrite Off
		Blend One OneMinusSrcAlpha

		Pass
		{
			Stencil
			{
				Ref 5
				Comp Equal
			}

		CGPROGRAM
			#pragma vertex vert
			#pragma fragment frag
			#pragma multi_compile _ PIXELSNAP_ON
			#include "UnityCG.cginc"

			struct appdata_t
			{
				float4 vertex   : POSITION;
				float4 color    : COLOR;
				float2 texcoord : TEXCOORD0;
			};

			struct v2f
			{
				float4 vertex   : SV_POSITION;
				fixed4 color    : COLOR;
				half2 texcoord  : TEXCOORD0;
			};

			fixed4 _Color;

			v2f vert(appdata_t IN)
			{
				v2f OUT;
				OUT.vertex = mul(UNITY_MATRIX_MVP, IN.vertex);
				OUT.texcoord = IN.texcoord;
				OUT.color = IN.color * _Color;
				#ifdef PIXELSNAP_ON
				OUT.vertex = UnityPixelSnap (OUT.vertex);
				#endif

				return OUT;
			}

			sampler2D _MainTex;
			sampler2D _AlphaTex;
			float _AlphaSplitEnabled;

			fixed4 SampleSpriteTexture (float2 uv)
			{
				fixed4 color = tex2D (_MainTex, uv);
				if (_AlphaSplitEnabled)
					color.a = tex2D (_AlphaTex, uv).r;

				return color;
			}

			fixed4 frag(v2f IN) : SV_Target
			{
				fixed4 c = SampleSpriteTexture (IN.texcoord) * IN.color;
				c.rgb *= c.a;
				return c;
			}
		ENDCG
		}
	}
}
Now we need to make two materials, Surface and Splatter, and assign the new shaders to them using their shader dropdowns.


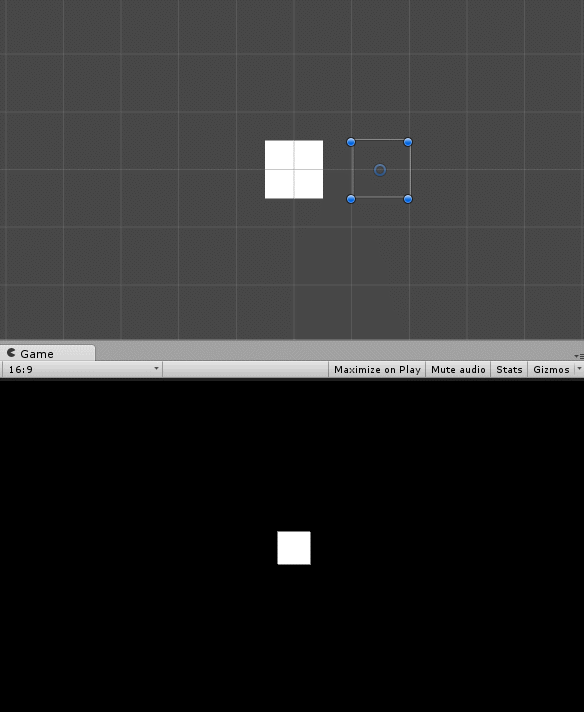
Finally, add two objects with sprite renderers to the scene. One named Surface, and the other named Splatter. Assign whatever sprites you want to them, and make sure Splatter is drawn above Surface by increasing its Order in Layer or adding it to a different Sorting Layer. Now, add the corresponding materials that were created earlier to each sprite renderer. If you move the splatter back and forth over the surface, it should only be drawn on the pixels of the surface and masked everywhere else.
Please download the demo project and play around with it to get a better idea of how this looks. It contains two scenes, Demo1 and Demo2. Demo1 contains a surface and a splatter sprite. Move the splatter sprite around to give you an idea of how this effect works. Demo2 contains many surfaces and the ability to shoot splatters as shown near the top of this post. Splatter will be shot from the center of the screen towards your mouse cursor when the mouse is clicked, and explode on the first surface that is hit.
The stencil buffer is a great feature that allows for all kinds of interesting effects, and makes it easy to draw simple paint and blood splatter using the approach above. Check out Prime31’s post about sprite occlusion for another example of what the stencil buffer makes possible. If you have any further questions please feel free to message me on Twitter @RyanNielson or comment below.